
This guide explains how to create and configure a Video Lesson Activity in Moodle. It focuses on activity-level settings and assumes the plugin is already installed and licensed.
Before you begin #
Make sure that:
- The Video Lesson Activity plugin is installed
- A free plugin license is activated
- You have editing access to a Moodle course
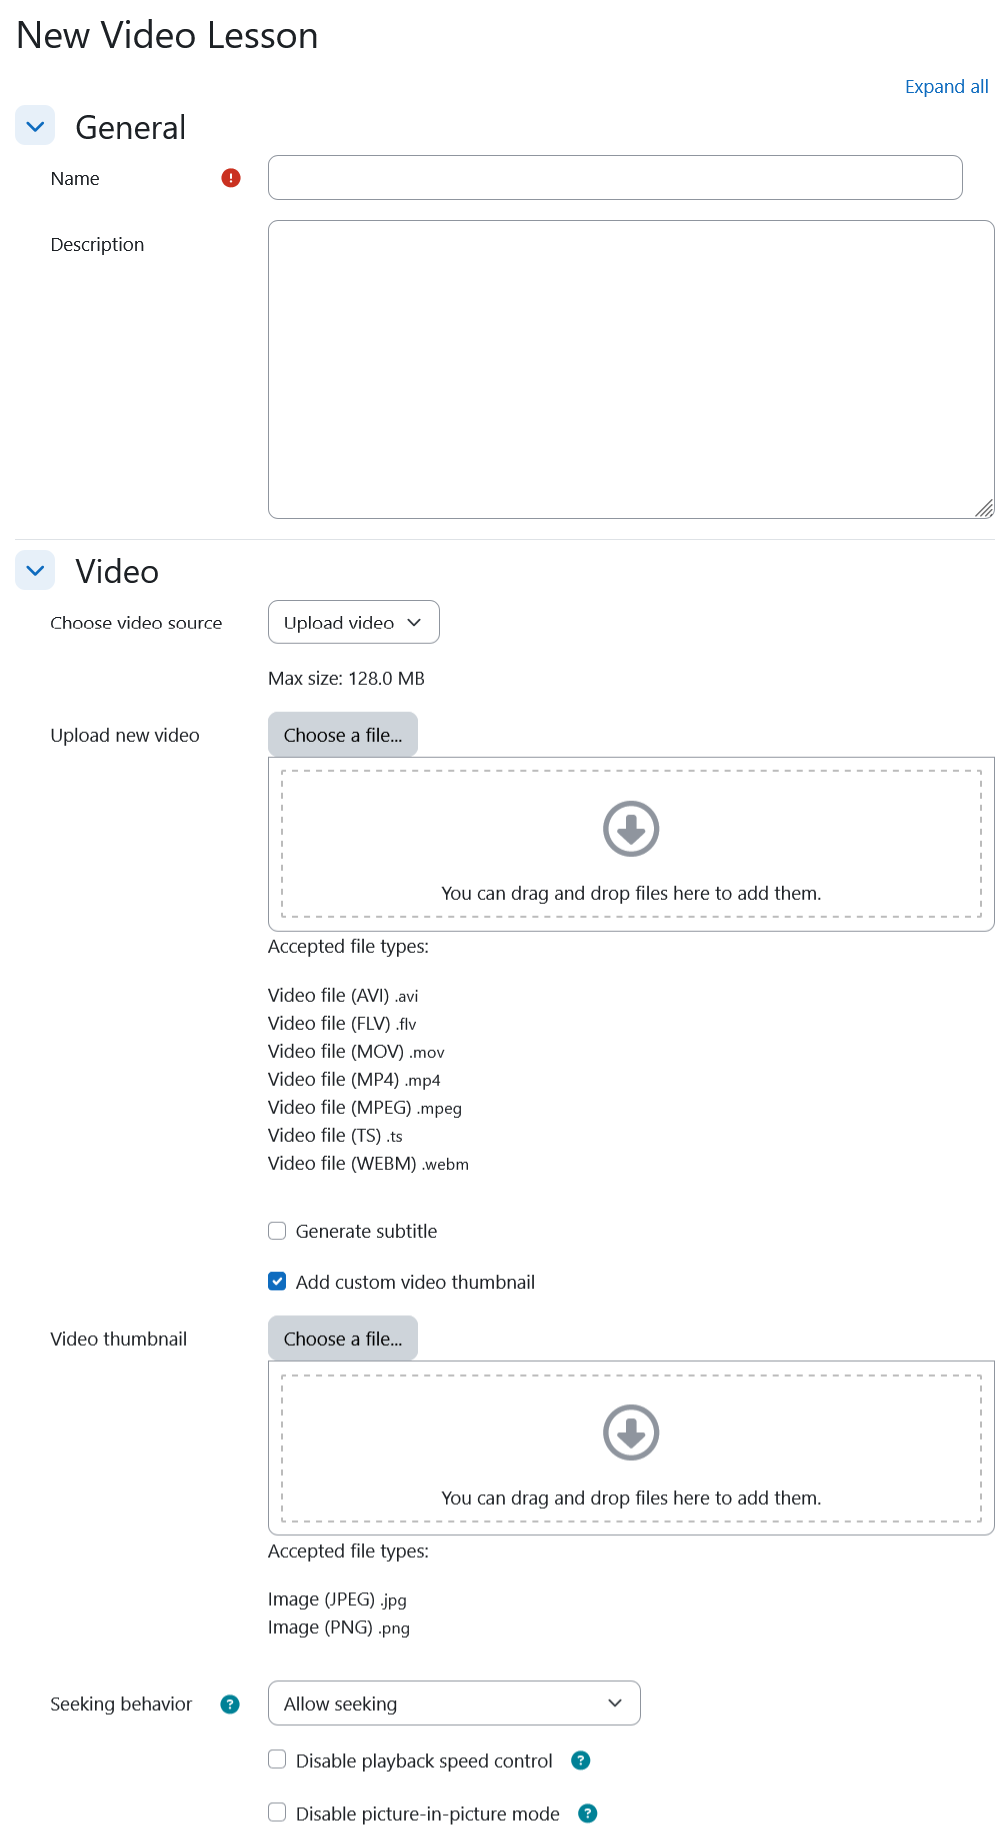
Step 1: Add the Video Lesson Activity to a course #
- Go to the course where you want to add the activity.
- Turn editing on.
- Click Add an activity or resource in the appropriate course section.
- Select Video Lesson Activity from the list and continue.
Step 2: Configure general activity settings #
Activity name
Enter a name for the activity. This is what students will see in the course.
Choose a clear and descriptive name, especially if the course contains multiple video lessons.
Description (optional)
You may add a short description or instructions for students.
This field is optional and does not affect video playback or completion.
Step 3: Select a video source #
When configuring a Video Lesson Activity, the Source dropdown provides three options, choose how the video will be provided.
- Upload video – Uploads a video file directly from the activity and adds it to the Video Library.
- Video library – Allows you to select an existing video from the Video Library.
- External link – Embed a video from platforms such as YouTube or Vimeo, or use an externally hosted MP4 video URL
After selecting the source, confirm that the video loads correctly in the preview.
Step 4: Configure video behavior (optional) #
You may control how students interact with the video.
Available options may include:
- Allowing or restricting video seeking
- Preventing skipping ahead while allowing rewind
- Limiting playback speed changes
- Disabling picture-in-picture mode
These settings apply only to this activity.
For a deeper explanation of these options, see Video Seeking Behavior.
Some video behavior settings may be enforced site-wide by administrators and cannot be overridden at the activity level. See Video Lesson Global Settings (Admin Guide) for details.
Step 5: Configure activity completion #
Scroll to the Activity completion section.
Enable completion tracking for the activity.
Select Require watch percentage and enter the percentage students must watch for completion, such as 80%.
This ensures the activity is marked complete only after meaningful video viewing.
For more information, see How Video Completion Rules Work and What “Watch Percentage” Means.
Step 6: Save the activity #
Once all required settings are configured, save the activity.
The Video Lesson Activity will now appear in the course and be available to students.
Step 7: View the activity as a student #
It is recommended to test the activity using a student account or by switching your role to Student.

